Authentic Macaron Filling Recipe (ganache)

I get this question a lot: What's the perfect French macaron recipe?
Being a certified French chef and founder of Pastreez, I have sold 1 million + macarons that shipped fresh across the entire United States.
In fact, Le Cordon Bleu Paris, the best pastry school in the world, wrote an article about us: Pastreez make the "most authentic macarons in the United States".
Just to let you know that you are in good hands!
In this detailed post, I will give you all my tips and tricks for an easy macaron recipe.
Oh and it's a beginner level guide. You will be able to make homemade macarons after reading this! No need to be an experimented baker.
Steps to make macarons
- Tips before to start
- Macaron ingredients and tools
- Almond flour and powdered sugar
- Italian meringe recipe
- Macaron batter
- Macaronage
- Piping macarons (silicone mat vs parchment paper)
- Drying time
- What type of oven to make macarons?
- Baking time (temperature and time in oven)
- What to do after the oven
- Macaron filling recipe (ganache)
- Macaron recipe: Final result
-
Tips before to start
I get always asked: What is a macaron? I wrote an entire post about it, but to sum it up, it's a French "cookie" composed of two shells with a filling in the middle.
I will be performing this recipe live and take pictures along the way. My wife and French chef as well will assist me to show you the best techniques.
Before to even start the recipe, you need to prepare your egg white, and let them rest at room temperature for few hours.

Doing that will make your meringue more smooth. You can use bottled egg white.
At Pastreez, we recommend to use real natural eggs to get a better quality. It’s more work but the result is much better for your meringue.
By the way, yolks are not used for macarons. But you’re free to use it for something else in your bakery.
Then, pre-heat your oven at 300°F with a kitchen cooking thermometer, such as this Taylor precision (on Amazon).

Note that we use a small electric convection oven, half pan size.
That is because they have more homogenous heat spread throughout the oven, and macarons are very sensitive to temperature.
We will dig deeper on the oven later on.
-
Macaron ingredients and tools
Are macarons hard to make? No. Ingredients are easy to find. But the process can be challenging.
Be methodical and follow the steps mentioned in this authentic macaron recipe (temperature, timing, and cool down period). You will be fine!
Are macarons vegan? No macarons are NOT vegan, because we use egg white in this recipe.
If you're interested to buy vegan macarons, we do have them on our store.
Do macarons have dairy? Yes, authentic macarons have dairy. Filling of macarons contain either butter or white chocolate, which contains dairy.
For this authentic recipe, we will do about 60 macarons for this recipe.
-
Ingredients
Here are the ingredients for 60 authentic French macarons:
| Ingredients | Quantity (oz) | Quantity (grams) |
| -- Main ingredients -- Bowl A | ||
| Extra fine almond flour | 5 1/3 oz | 150g |
| Extra fine powdered sugar | 5 1/3 oz | 150g |
| Egg white | 2oz | 55g |
| Food coloring | 1/4 teaspoon | 1g |
| -- Meringue ingredients -- Bowl B | ||
| Sugar | 5 1/3oz | 150g |
| Water | 1 3/4oz | 40g |
| Egg white | 2oz | 55g |
So there are two bowls: A and B. Don't worry it is actually pretty easy!
-
Tools needed to make macarons
Here are the tools you need to make macarons properly:

Everything you see in this picture will help you during this recipe:
| Tool | Why? |
| 2 x Bowls | 1 x bowl for the main recipe, 1 x bowl for the meringue |
| Pan | Used to boil the syrup used for the Italian meringue |
| Hand spatula | Perfect for the macaronage |
| Probe thermometer | Ideal to measure the temperature in your pan |
| Recipients | To pre weigh your ingredients |
| 2 x Piping bags (18in) | To pipe your macaron and your filling |
| 2 x Ateco 804 tip | This metal tip helps to pipe properly |
-
Almond flour & powdered sugar
Start by mixing the almond flour and powdered sugar together.

You need to get an homogeneous mix with no lumps.
If you are in a dry area, that’s perfect. Water is the worst enemy in a macaron recipe.

Are you in a high humidity zone? Don’t panic. You need to find the finest almond meal possible to avoid getting lumps.
If your almond flour still makes lumps, pass it through a sifter before your recipe. It will prevent any lump to go in your bowl.

-
Italian meringue recipe
There are multiple variations of meringue: Italian, French, Swiss, etc.
An Italian meringue is a "cloud shaped" and airy mixture made with egg white, water and sugar.

The main difference with the French meringue, is that the Italian version is made with hot sugar. This will strengthen the texture and make better macaron shells.
Macarons are best with an Italian meringue, because the shells will be less fragile.
I made a video to compare Italian meringue and French meringue, for those who want to dig deeper.
Quick reminder: Macarons are French. Catherine de Médicis (Italy) bring the shells recipe to the French king's chef in Paris.
Only then the chef decided to "sandwich" two shells with a soft filling, to create a balance of texture that we know today.
That is why the Italian version of the meringue is best, because shells originally come from Italy.
-
Steps to follow
Add the water THEN the sugar in your pan. The order is very important, to avoid sugar to burn the bottom of your pan.


You now have to start two tasks at the same time. First, start growing your egg white with your mixer.


PS: We don’t advise to do this by hand, since you need to check your syrup temperature at the same time. But if you only have a hand mixer it will still work!
Then, boil your syrup. Use a thermometer similar to this one.
It is VERY important to be accurate with the temperature of your syrup. One degree higher or lower will mess up your recipe.


Your thermometer has to reach precisely 117°C. Once it has reached 117°C, pour the boiled sugar into your egg white that was with the stand mixer.
Make sure to keep the mixer mixing while you pour. Then let the whole bowl mixing and cooling down for about 5 minutes.
-
Italian meringue: The result
After 5 minutes, you should get a cloud-like looking, thick texture like this:


-
Macaron batter
What we call "macaron batter" is the almond flour, powdered sugar and egg white mixed together.
Take bowl A and add egg white + food coloring into it. Mix vigorously until you get a thick batter like this.


A good test to be sure you have the right texture: Place your spatula in it. If it stands still, you're ready for the next step!

-
Macaronage
Do you know what is macaronage? It is the action of mixing the meringue with the almond + powdered sugar.
I made a video on our Youtube channel if that helps! Below are the pictures of the recipe though.

Pour your meringue with the hand spatula into bowl A, the one that contains your almond flour + powdered sugar.

Then mix it vigorously doing circles. You want to mix "hard" but not for too long. If you do, you'll release the oil based in the almond and ruin the entire recipe!


-
Piping macarons
There are few steps I want to teach you to pipe macarons like a pro.
-
Prepare your piping bags
Piping is not very difficult, but a bit technical. We use 18 inches piping bags and an Ateco 804 tip in this recipe.
First, get your piping tip, piping bag, your batter, and a large jar similar to this one.
Then, cut your piping bag about 5cm (2 inches) to the top. You can adjust the length here depending of the nozzle you have, but if you got the one we advised, stick to 2 inches.
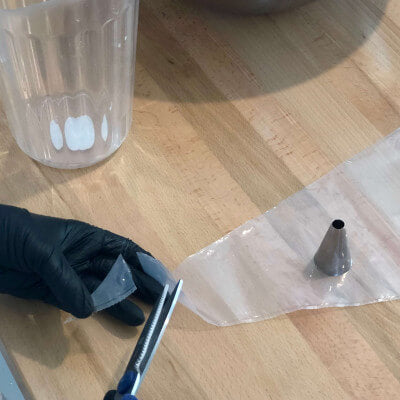
Then twist the bag and insert it into the tip.

Wrap the piping bag around a recipe. This is a crucial advice to avoid spilling your batter.

Now pour your batter into the piping bag. Twist the top tight, and press to release a bit of batter.


Voilà! You are ready to pipe your macaron shells. But before that, I'd like to explain two options: Parchment paper or silicone mat?
-
Parchment paper or silicone mat?
This video compares the pros and cons of both. I baked a batch with both parchment paper and a silicone mat, from start to finish. Have a look!
Overall, I recommend you to use silicone mats. They are reusable. Perfect to buy it once and for all.
These molds also have two guide rings, which help to get perfect round shape.
It’s hard to find parchment paper with ring printed on it. And almost impossible to get round shape by hand with it.
The molds also help to get same size macarons. The mats rings will act like a "stop barrier", avoiding weird shapes.
-
Pipe macarons like a French chef!
When I was at Le Cordon Bleu Paris, the best pastry school in the world, they teach us how to properly pipe macarons.
Remember this: Top hand presses, bottom hand guides.
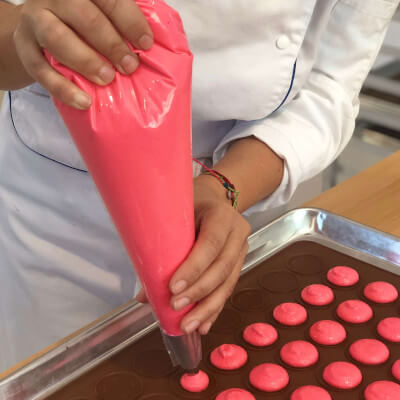
The coordination is hard in the beginning, but you'll be fine within few minutes. No rush! You don't need to pipe fast, as long as you release the correct amount of batter.
Top hand = Squeezing hand. Block the piping bag between your index finger and your thumb, and squeeze to release the batter.
Bottom hand = Control hand. This hand controls the direction and where to pipe.
Little by little, you’ll see that the piping bag has less pressure.
It’s time to twist again the piping bag and block it again between your index finger and your thumb. Keep going this way until your bag is empty.
Most common mistake: Do not squeeze your bottom hand. You’ll see a lot a of videos out there when they squeeze their bottom hand, that’s not the way to do it properly.
Think of it like tooth paste: You squeeze first on top when it’s full, and little by little you squeeze close to the nozzle. It’s exactly the same here.
Using mats, it's even easier. See below.
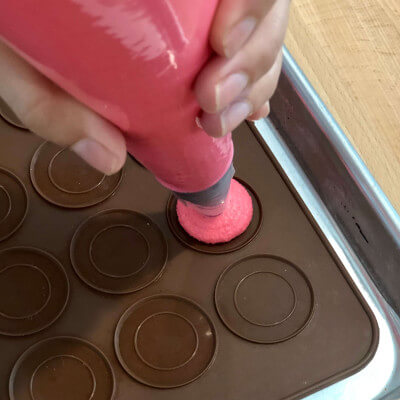
Your piping ring is the first inner circle. It means that when you pipe macarons in it, you need to STOP once the batter arrive this first ring (below in green).
It might seem odd, but the first circle filled with batter is enough as it will spread naturally to the second ring after (below in blue).

You probably noticed that your batter has almost naturally reached the second circle. That’s normal.
Tap at least ten times your pan sheet vigorously on the rubber mat. It’s important that you tap hard enough to spread your batter. Ten taps is enough in general.

Beware to not overflow: Your macarons might touch each other, they would be ruined.

Why do we tap? Two objectives: Spread your batter and remove air bubbles, responsible for hollow macarons (empty inside). This is a crucial step. Not taping hard enough / long enough and your macarons will be ruined.
-
Drying time

You have completed the piping step. Good job! Your batter now needs to rest and dry at least half an hour.
Why do we have to wait before oven?
If you put your pan sheets too early in the oven, since macarons are very sensitive to heat, they will pop and crack on top.
Letting them dry enough will make the surface harder, more resistant to heat, and your shells will rise perfectly.
How to know when it’s dry enough?

See the difference between these pictures? Just after taping, your batter is still glossy.
After a while, it’s not shiny anymore. To make sure it’s ready, touch it. If it’s not sticky you are good to go. Waiting 30 minutes is a good start.
PS: It highly depend on humidity in your area. The more humid, the more you let it dry.
-
What type of oven to bake macarons?
Small convection ovens are best. But gas works too if it’s not too big.
Convections are the best because the temperature is homogeneous compared to gas, where heat is concentrated at the bottom.
We also advise small ovens, to preserve again the homogeneity of heat. If you bake on bigger ovens, you’ll notice that the corners are hotter.
It’s totally normal because there is a gradient of temperature between corners and center, and the bigger the oven the bigger the gradient, the bigger the problem.
How to measure temperature precisely in the oven?

Don’t trust your built-in oven temperature. Place a thermometer in the center of your oven.
You’ll see that even when your oven says 300°F, it’s not really. Adjust until the thermometer you placed inside reached exactly 300°F.
-
Baking time

Once you’ve reached 300°F, go ahead and place your pan sheets in the oven. Make sure to do it as quickly as possible.
Why as quickly as possible?
Remember that your oven is small, and your temperature is accurate. You don’t want to leave your oven too long open and decrease temperature.
In our case, we bake two half pan sheets at the time. It surely takes more time to do it in smaller batches, but the result is almost guaranteed.
15 minutes in oven is average. However, depending on humidity in your area, you would push it to 16 minutes.
After the 5 first minutes, quickly open and close your oven. You’ll see vapor (humidity) escaping. Too much humidity might result in cracks on top of your macarons.

Once the 15 minutes lapsed, observe. If all went well, you’ll see your macarons growing with a flat/round top, with no cracks.

Do macarons always have the same shape?
No. But the standard is what you see here. Keep in mind it’s a handcrafted product: Each bakery and each kitchen will have their specificities.
If they’re too flat, you might have waited too long to bake them, or temperature was too low.
-
After the oven

You’re almost there. Now your macarons are hot, and waiting to be filled with a tasty ganache.
But wait. They’re too hot to be removed from the baking mat now. You need to wait at least one hour to let them cool down.

Why do we wait? Macarons shells are DRY cookies. Without the filling, they need to be crusty. If they’re not, next batch you need to let them more time in the oven.
If you try to retrieve them too early, they might stick to the mat, even when they’re well baked. Waiting will avoid potential sticky macarons to be ruined.
The longer you wait the better.
Once they’re cold, you can remove your shells from the mat.

They should be like this. Reminder: if you try to remove them too early, they might stick to the mat because the shells would still be hot.
That being said, « perfect » flat macarons feet are not necessary to have a great macarons. Having some like those below is good enough.
Remember that we’re doing genuine french macarons by hand. Lots can happen in the way.
And flat feet does not really matter, what matter is that your macarons are well cooked and homogeneous (not hollowed).

Macarons are well know for the crunchy / chewy experience.
Once you put your ganache (filling) between two shells, the osmose between filling and shells will happened. And your flat feet won’t affect this experience.
-
Macaron filling recipe (Vanilla ganache)
You did it! You now have your macaron shells ready. You're just missing the filling.
What kind of filling for macarons?
There are two main recipes for macaron filling: Buttercream or ganache.
Buttercream is the most common that every blog out there will teach you. It is made with butter and is very fat. It also does not stay well at room temperature, because of the butter (it melts at room temperature).
Then, there is ganache. The base is white chocolate. It is more tasty, less fat, and way more stable at room temperature. It also last weeks compared to the buttercream that lasts only few days.
At Pastreez, my online macaron store, I use ganache. That is what I will teach you here: A vanilla ganache macaron recipe!
For this recipe, you need a bowl, 2 x small bowl, a scale, pan, whisk and spatula. That's it!
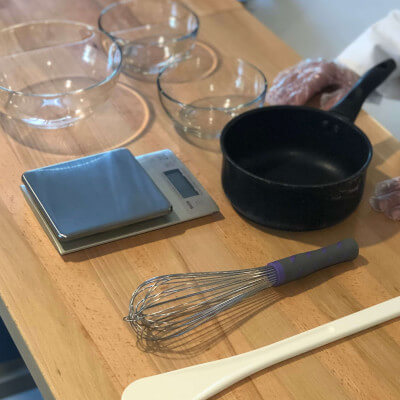
Start by adding 100g (3 1/2oz) of white chocolate chips to a small bowl.
Size of the chips does not matter since we’re going to melt it afterwards. Do the same with 45g (1 1/2oz) of heavy whipping cream.

Empty your white chocolate into your big bowl. Then empty the cream in your pan.
Now start boiling your cream. Once you start to see bubbles remove your pan from the fire. Then poor the hot cream on your white chocolate chips.

Whip with your whisk. The hot cream will melt the chocolate chips.

The whole mix should turn into a liquid ganache. Make sure that you eliminate all lumps.
Don’t worry if the ganache is liquid, that is completely normal because it’s still hot. At the end, it should be like this:
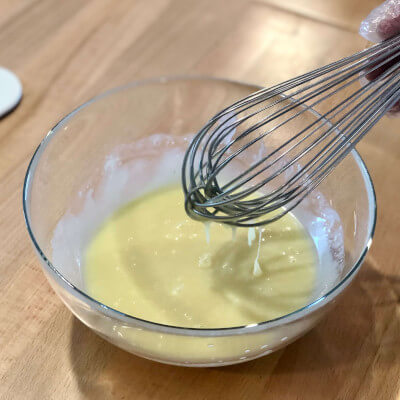
Put your ganache in the fridge for at least an hour. The temperature of your filling should be about 10°C (50°F).
You’ll notice that your ganache is thicker. That is a good sign to continue with the recipe.
Next, you have to use a hand mixer. The idea is to add volume to your filling and let it breathe. Stop mixing when you have a creamy texture like this.

Then use the second piping bag, with the same technique to pipe.
-
Macaron recipe: Final result
The moment you've been waiting for. It's time to pipe the vanilla macaron ganache between two shells.
the white chocolate chips used here were flavored with natural vanilla. But you can add your own Vanilla pod to the filling for a tastier experience.
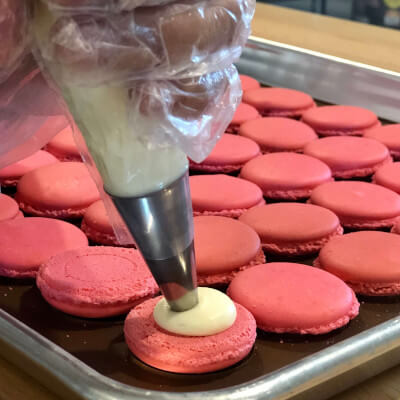
Now "sandwich" the filling.

And the final result:

Voilà! But wait. You can't serve them right away.
Macarons need time for the filling to spread into the hard shells. Place them in a sealed Tupperware and refrigerate for 2-3 days.
That's the time needed to create that perfect balanced texture: Crunchy outside and chewy inside.
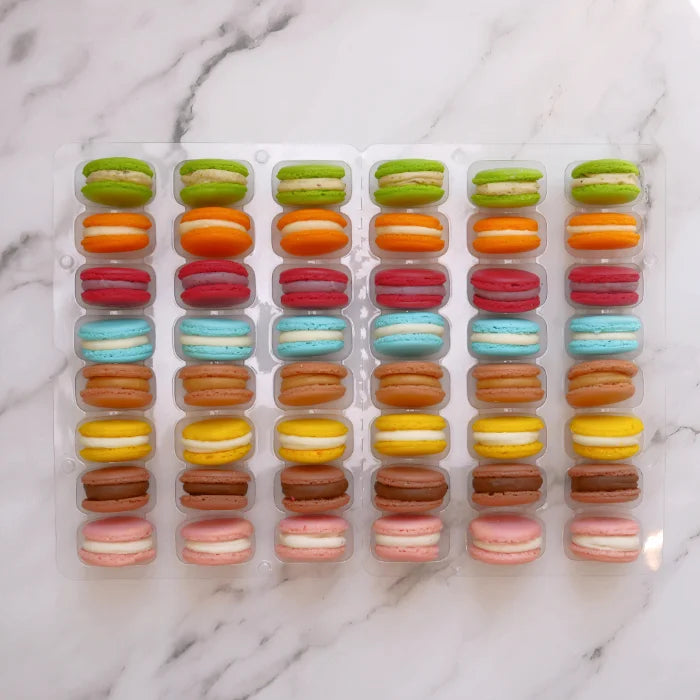
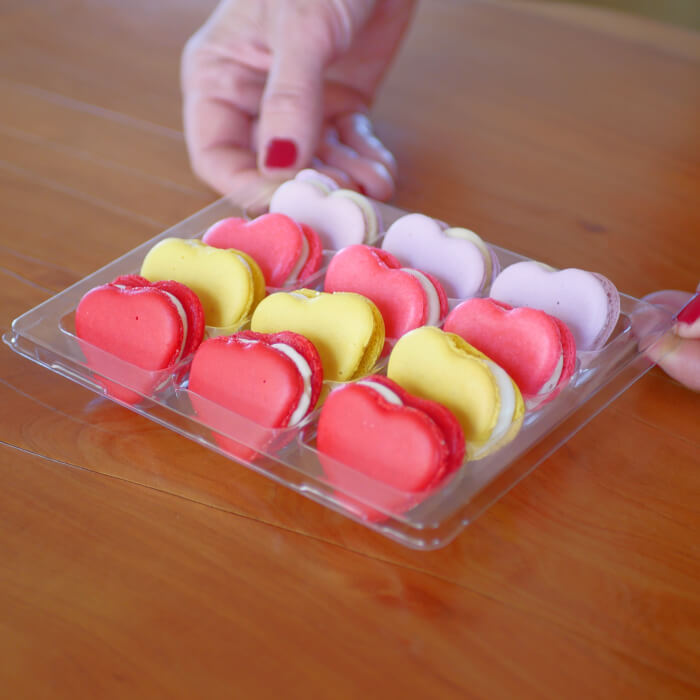
Now if you are wondering: What do macarons taste like? Read my full article or watch the video below.







Rose
Jul 30, 2024
On the scale do I reset the scale after placing the measuring cup on it, to measure the flour, etc.?
Robin Vince
Jul 30, 2024
Great recipe and excellent step by step directions! If I wanted to deviate from the traditional vanilla filling , how would I infuse other flavors? Also , can you use other not flour such as hazelnut, or pistachio? Last question is would you recommend making your own nut flour to control the texture? Thank you so much!
John Dad Baker
Jul 30, 2024
This was a clear well written recipe. May be above my skill but I want to try it
Kristin Berg
Jul 30, 2024
I tried these after one day and thought I messed them up. Then I tried them after 2 days and they were amazing. Brought them to work and have people asking me to make them again!
Classiblogger
Jul 30, 2024
Nice to see So colorful macarons!! I have been thinking that making French macarons are difficult. But after reading your post and step by step illustrations i think anyone can prepare at home.
Anthony - French chef
May 29, 2023
@Rose sorry for the confusion! Pour the hot cream on top of the chips, to avoid splashing :) The objective is to get the chips to melt with the cream. Hope that helps!
Anthony - French chef
May 29, 2023
@Audrey thank you! Hope it helped with your recipe, and looking forward to your order :)
Rose
May 29, 2023
I’m confused for the ganache. Do I make two bowls of white chips it says to put the chips in the pot with cream but it also says to pour cream over chips.
Audrey Maisonave
May 15, 2023
I’ve been baking macrons for about a year now and I was so impressed to actually get an authentic recipe.
I have always wanted to try an authentic macaron to see how close I came to duplicating your technique.
I will definitely be placing an order and I’m gonna try your Recipe tomorrow. Thanks so much!
Anthony - French chef
Mar 22, 2023
@Sharon always happy to help! I hope you had great results and succeeded in your homemade French macaron recipe.
Anthony - French chef
Mar 22, 2023
@Kristin merci! I hope it has helped you achieve a great macaron batch
Anthony - French chef
Mar 22, 2023
@Suzanne Merci! I hope you’ll have a great experience. Feel free to chat with me below for anything.